本文介绍Ubuntu 22.04手动搭建LNMP环境并做基础配置。nginx和php使用Ondřej Surý的ppa源进行安装和升级,mysql使用Ubuntu自带的软件源进行安装。本文操作在root账户下进行,非root用户需要使用sudo提升执行权限。
安装NGINX
添加nginx软件源
稳定版本
apt install software-properties-common -y && add-apt-repository ppa:ondrej/nginx -y
主线版本
apt install software-properties-common -y && add-apt-repository ppa:ondrej/nginx-mainline -y
安装nginx
sudo apt -y install nginx
查看nginx版本号
nginx -v
查看服务运行状态
systemctl status nginx
设置nginx服务开机自启动
systemctl enable nginx
重启nginx服务
systemctl restart nginx
安装PHP
添加php软件源
apt install software-properties-common -y && add-apt-repository ppa:ondrej/php -y
安装php8.1及常用扩展
apt install php8.1 php8.1-fpm php8.1-curl php8.1-mbstring php8.1-ldap php8.1-tidy php8.1-xml php8.1-zip php8.1-gd php8.1-mysql -y
配置php
cat > /etc/php/8.1/fpm/conf.d/config_php.ini << EOF
expose_php              = Off
error_reporting         = E_ALL & ~E_NOTICE
display_errors          = Off
display_startup_errors  = Off
log_errors              = On
error_log                = /var/log/php_errors.log
ignore_repeated_errors  = Off

allow_url_fopen         = On
allow_url_include       = Off
variables_order         = "GPCS"
allow_webdav_methods    = On
memory_limit            = 128M
max_execution_time      = 300
output_buffering        = On
output_handler          = ""
zlib.output_compression = Off
zlib.output_handler     = ""
safe_mode               = Off
register_globals        = Off
magic_quotes_gpc        = Off

file_uploads            = On
upload_max_filesize     = 50M
post_max_size           = 50M

enable_dl               = Off
disable_functions       = ""
disable_classes         = ""
session.save_handler     = files
session.use_cookies      = 1
session.use_only_cookies = 1
session.auto_start       = 0
session.cookie_lifetime  = 0
session.cookie_httponly  = 1
session.save_path = "/var/lib/php/sessions"

opcache.enable=1
opcache.enable_cli=1
opcache.interned_strings_buffer=8
opcache.max_accelerated_files=10000
opcache.memory_consumption=128
opcache.save_comments=1
opcache.revalidate_freq=1

date.timezone            = "PRC"
EOF
重启php服务
systemctl restart php8.1-fpm.service
安装ionCube Loader模块(可选)
下载ionCube Loader扩展
wget https://downloads.ioncube.com/loader_downloads/ioncube_loaders_lin_x86-64.zip && unzip ioncube_loaders_lin_x86-64.zip
ioncube_loader需与php版本相对应,这里选择php8.1版本的ioncube_loader。将ioncube_loader_lin_8.1.so复制到php8.1的扩展目录/usr/lib/php/20210902
cp ioncube/ioncube_loader_lin_8.1.so /usr/lib/php/20210902
添加ioncube_loader模块配置文件
cat >> /etc/php/8.1/mods-available/ioncube.ini << EOF
zend_extension = ioncube_loader_lin_8.1.so
EOF
将ioncube_loader模块接入php-fpm和php-cli并重启php8.1-fpm
ln -s /etc/php/8.1/mods-available/ioncube.ini /etc/php/8.1/fpm/conf.d/01-ioncube.ini && \
ln -s /etc/php/8.1/mods-available/ioncube.ini /etc/php/8.1/cli/conf.d/01-ioncube.ini && \
systemctl restart php8.1-fpm.service
检查ioncube_loader模块是否生效
php -v
终端输出信息中包含with the ionCube PHP Loader v12.0.2, Copyright (c) 2002-2022, by ionCube Ltd.说明ionCube模块安装成功
PHP 8.1.12 (cli) (built: Oct 28 2022 17:39:57) (NTS)
Copyright (c) The PHP Group
Zend Engine v4.1.12, Copyright (c) Zend Technologies
with the ionCube PHP Loader v12.0.2, Copyright (c) 2002-2022, by ionCube Ltd.
with Zend OPcache v8.1.12, Copyright (c), by Zend Technologies
删除临时文件
rm -rf ioncube ioncube_loaders_lin_x86-64.zip
如果php安装出现问题
通过如下命令查找到nginx之后,查看报错日志
find / -name nginx.conf
安装MySQL
使用Ubuntu自带的软件源进行安装,本例安装mysql8.0
apt install -y mysql-server-8.0 -y
登录mysql控制台,密码默认为空
mysql -uroot -p
设置root用户密码,本文以设置root用户密码123456为例
ALTER USER 'root'@'localhost' IDENTIFIED WITH mysql_native_password BY '123456';
允许root远程登录
use mysql
//查看
select host,user from user where user='root';

//设置允许任何IP登录
update user set host='%' where user='root' and host='localhost';

//刷新权限
flush privileges;
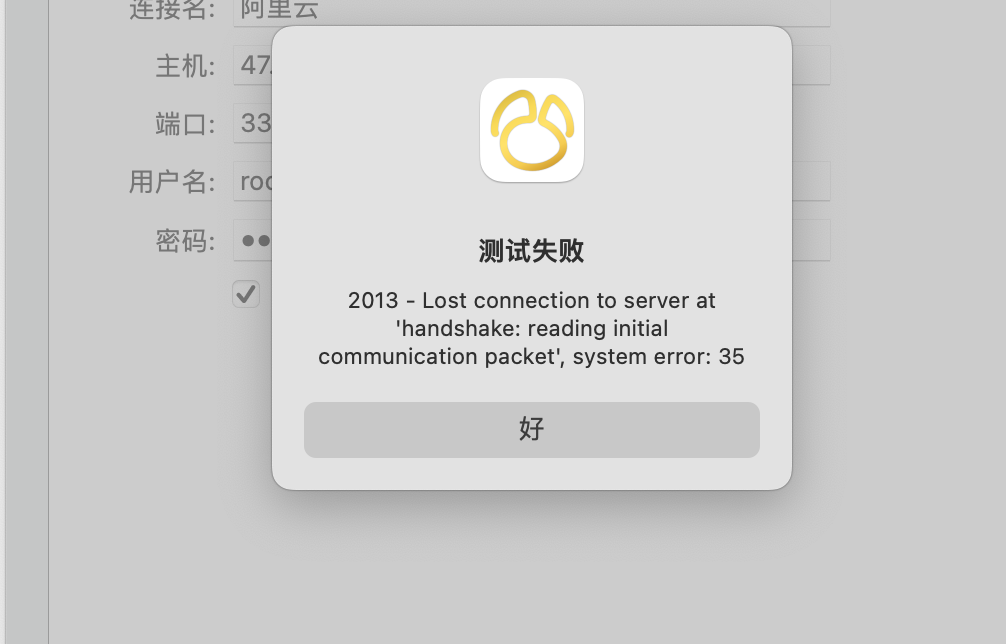
原因:
- mysql配置问题:/etc/mysql/mysql.conf.d/mysqld.cnf中,查看查看
bind-address,如果是127.0.0.1,则连接不上,修改为0.0.0.0。 - 阿里云服务器的控制器配置安全组规则:点击云服务器ESC->网络和安全->安全组;进入点击最后的配置规则,然后看没有3306端口,添加安全组规则(使用快速添加 3306端口即可)
参考
lnmp环境搭建_云服务器 ECS(ECS)-阿里云帮助中心 (aliyun.com) Linux服务器连接不上3306端口,解决_mgr database ip:127.0.0.1 port:3306 is disconnecte-CSDN博客
